How to make an adjustable pot hanger system.
Finally, it seems like spring has sprung and more people are getting out into the woods. What better way is there to enjoy your time then to be able to make yourself a hot drink on an open fire? Today I’ll show you the way I make an adjustable pot hanger set for cooking and boiling water over a small open fire.
Tools:
Tools needed for this are pretty simple really, a saw and a knife. A Bahco Laplander folding saw works well and a fixed blade knife is preferable for jobs like this. I’m using a custom made tang knife by a company called Stoney Paths.
Materials:
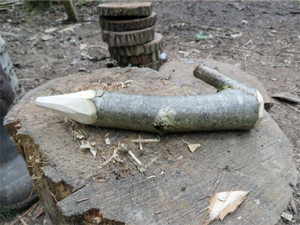
I am using green wood as it’s easier to carve and won’t burn as easily and have gone with Hazel. You will need: One long straight pole thumb thick and two/three feet long, one Y-shaped piece around 'thumb thick', and 2 “7” sticks (a piece off a branch that looks a little like a number 7 shape).
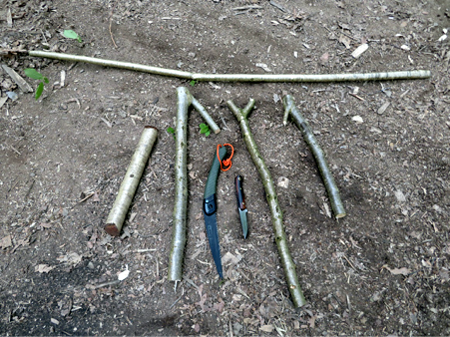
Tools and Materials
The first “7” stick is around 'thumb thick' and about 20cm long and the other is probably twice as thick and about 50cm long.
The last piece is just a 'wrist thick' piece of wood around a foot long that I use as a baton.
Use the Laplander saw to cut the pieces to length on a cutting block or a stump.
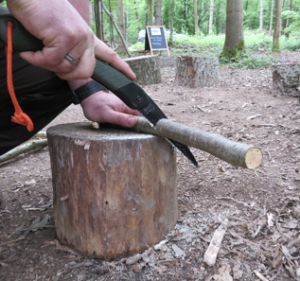
Use the knife to “crown” the top edges of the first “7” stick slightly. Then make a spike at the end of the same stick, just pointed enough so that it easily drives into the ground.
Firstly make sure you are at least an arm's length and the length of the tool you are using away from anyone else. These are three popular and safe sitting positions for knife work:
Side saddle – so you are cutting away from yourself.
If you are sitting head on then lean forward and rest your elbows on your knees, again cut away from yourself.
The other option is a chest lever cut where you can generate a lot of force whilst safely cutting away from yourself.
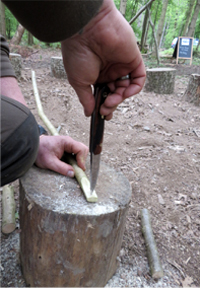
For the pot hanger (7 stick) clean it up and cut it to length a little.
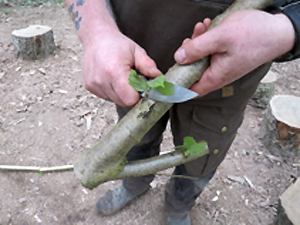
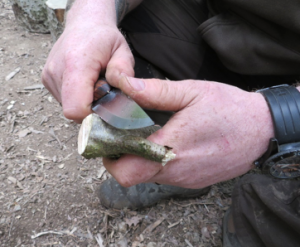
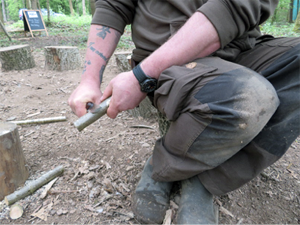
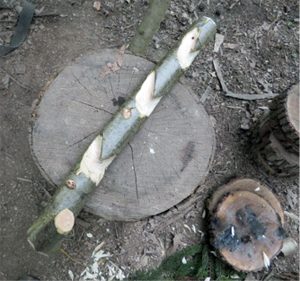
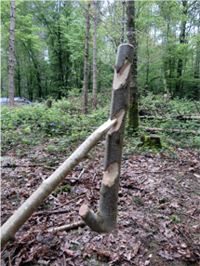
To make the hanging sections for the pot I create three separate “beak” cuts into the large 7 stick at different heights on the side of the 7 stick facing the piece that sticks out. Lay the piece on something like a stump or chopping block and then lay the knife blade against it diagonally across the width. Taking my baton in my stronger right hand I hit the back edge of the knife driving the blade a good few mm down into the wood. To free the blade again, simply lift slightly and hit the wood with the baton.
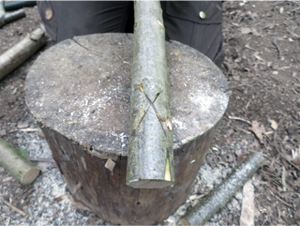
For the second cut simply make a line through the first cut from the other direction forming a large X shape. Repeat this process in two other places along the shaft.
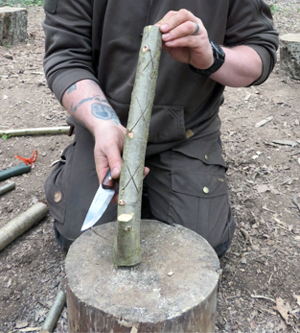
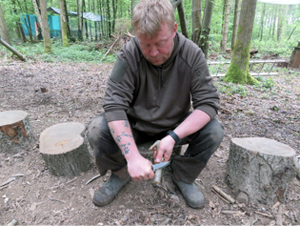
To create the beak cuts you need to use the knife to cut away the wood around the X shape leaving just a downward pointing triangle that points down towards the 7 end. Keep going until you are left with something like this. Repeat this process on the other two X marks.
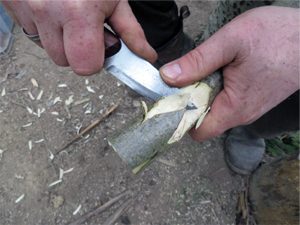
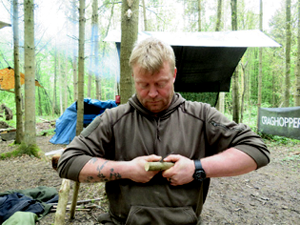
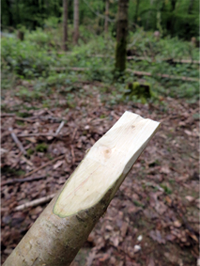
Next take the long, straight pole and thin down one end evenly with your knife. Then using the very tip of your knife make a small divot in the end to help the beak of the large 7 stick sit evenly.
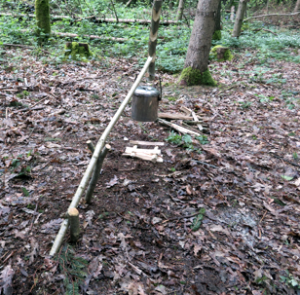
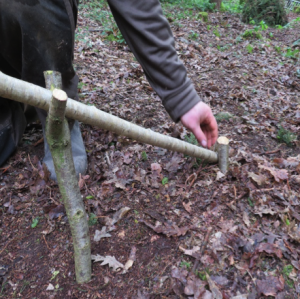
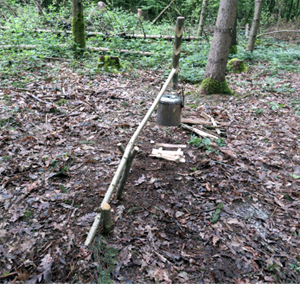
Time to start assembling your pot hanger system. Choose your fire site and drive your Y piece stick into the ground.
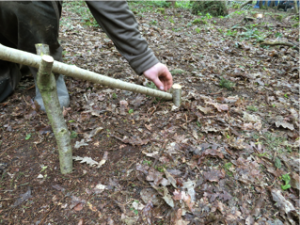
Slide your straight piece along the Y until you’re happy with the length and the height and then using your small 7 stick drive it into the ground at the end of the straight pole to hold it in place. Place your 7 sticks with beaks at the end of the straight stick and hang your cooking pot off it.

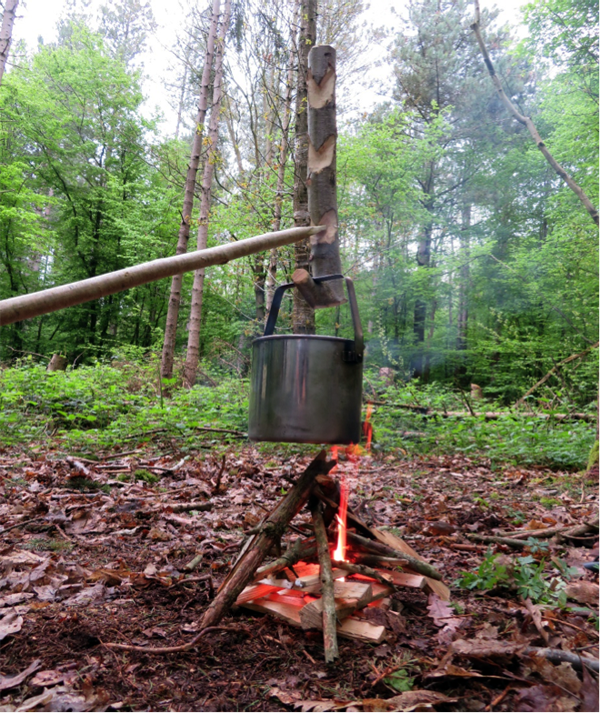
You can now set up your fire site below the end of the stick.
As the fire dies down, you can easily adjust the height of the pot by simply moving up or down the beak cuts on the large 7 stick.
Time for a brew!
Once all done I safely extinguish the fire and clear away so you’d never know I’d been there, remember, leave no trace!
Craig Fordham – Black Wolf Survival & Bushcraft
Comments are closed for this post.

What a fantastic project.
Will make it on my summer holiday!
Penny Miller
5 July, 2018