Woodlands.co.uk

Blog - Art & Craft

Lino cutting and printing

Lino cutting and printing

by Bridget, 13 December, 2022, 1 comments

The first stage to lino printing is to find inspiration. Christmas is a great time to try this craft as it can be used in Christmas cards or for printing your own wrapping paper. It's important to bear in mind that shapes are paramount with lino cutting and printing, so it's a good idea to look for distinctive shapes with clear edges. You can add in shading or marks after printing if you choose.    Winter is a great time to look for inspiration. I like to look in the woods. While walking, I look for leaf shapes or dried seed heads are my favourite. You can also draw from imagination if you prefer. Leaves like holly are fairly easy to draw with their clear defined points.    When I've collected some specimens I need to transfer them to paper so I can trace the shapes on to the lino. I'm not the best artist so after a few disappointing sketches I came up with another plan. I photocopied the leaves and seedheads by placing them on the glass of the copier and covering them with a sheet of white paper.   Bingo! They came out really well.   [caption id="attachment_39235" align="alignright" width="300"] Seed head[/caption]                   The hemlock seed heads looked a little cluttered which is tricky to create on the lino so I stripped the seeds and tried again. Important to remember some seeds, leaves etc are toxic so you need to be sensible handing them. [caption id="attachment_39246" align="aligncenter" width="675"] Tracing the leaves[/caption] Once I have the copied shapes or drawn the images I trace them onto tracing paper then flip the tracing paper and rub the back to transfer the image on to the lino. If it's not completely clear you can re draw it or draw directly on to the lino. When you have an image that you're happy with it's time to cut.   So, what will you need ? [caption id="attachment_39236" align="aligncenter" width="675"] Cutter with various nibs, plus a roller.[/caption] Lino.  This comes in different levels of density and lots of different sizes. You can purchase a selection to find out which you prefer. I buy from Etsy but there are many other available sources. Tools.  Cutting tools are small, shaped blades that fit into a handle. It takes some trial and error to find out what works for a design so good to have a spare square of lino for making practice cuts. [caption id="attachment_39238" align="aligncenter" width="675"] Cutting a flower shape[/caption] I cut my design or outline into the lino square - remember - what ever you remove will be white on the final print - and cut any detail I want with different blades. This may be trial and error and you can always come back and cut more but, obviously, cannot fill back in. Ink roller.  A small plastic or rubber coated roller, like a mini paint roller. This is the fun bit. Choose your ink colour and put a little ink on a smooth surface. I have an ink tray but you could use an old tile or similar. Roll the roller in the ink then over the design making sure it's well covered them press the lino piece onto paper or card or the other way around - pressing the paper on to the lino and run your fingers over the back to transfer the ink.  [caption id="attachment_39239" align="aligncenter" width="673"] Place ink in the tray and spread[/caption] [caption id="attachment_39240" align="aligncenter" width="675"] Evenly spread the ink on the roller and roll over the shape on the Lino[/caption] Inks   These come in every colour and shade and are water based so you can get proper messy and it all washes off. [caption id="attachment_39237" align="aligncenter" width="675"] Rolling tray and different colours of ink[/caption] It's entirely possible your creation doesn't look exactly how you wanted it to first time. It's a process where you will tailor how you draw, cut and print to get to what you want to achieve.   If you want you can add to a print with another ink colour and fill in different shape with another link cut or overlap a design or colour. There is lots of inspiration on the internet.  Designs can be simple or complicated depending on who is creating.   My daughter enjoyed making a toadstool print which was a simple shape and cut and now plans to make some Christmas cards. [caption id="attachment_39241" align="aligncenter" width="675"] Place lino onto card to print image and allow to dry.[/caption]
Growing Osier for Basketry.

Growing Osier for Basketry.

by The blog at woodlands.co.uk, 17 November, 2021, 2 comments

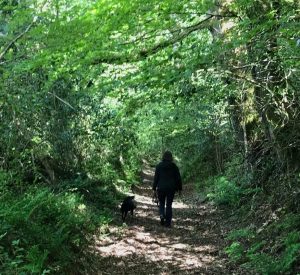
Along with my wife Marie, we purchased a 3 ½ acre semi ancient woodland in South Wales from woodlands.co.uk in April 2020.   The site has a gentle slope from a country lane down to the river Rhymney, we have 2 springs, a stream, a wide variety of broadleaf trees, shrubs and a small amount of pine.   Much of the site had been neglected for many years and so with help and advice from others and a great deal of hard graft by Marie and I we are bringing the site back to a sustainable future. It is a delightful place to be, family and friends all enjoy spending time there and I don’t think I have ever been to the woodland without seeing or discovering something new.   We made a decision early on that an open area next to the river would be a good place to grow willow but we also wanted to utilise some willow for basketry. We had experience of neither.   The river can breach its banks and wash over the area occasionally although this is generally very short lived.  Although the rest of the woodland will be maintained with native species, the willow area is an experiment and we decided to plant a variety of species for basketry, some of these are non-native. We read a great deal about varieties, planting and harvesting and decided on the varieties we wanted to grow.   A very useful book titled Willow by Jenny Crisp gave us a lot of helpful information and ideas.  We based our choices around colour, they range from golden brown to yellow, red, green and black. Each variety will grow to different lengths in the same year once established, some as much as 17 feet. We searched on the internet for suppliers of cuttings for planting and were very fortunate to find a supplier, https://hattonwillow.co.uk/ based only a few miles away in Caerphilly.   Hatton Willow is run by a Sarah Hatton*, she has a plantation with 1000’s of willows and supplies cuttings for planting and basketry, runs basketry classes and makes various commissions as well as the odd appearance on 'The Repair Shop' and 'Country File'. The plants are supplied as rootless cuttings, about 12 inches long in the winter and need to be planted between November and March.  You are advised to lay weed suppressant material and to push the cuttings through this into the ground. If like us you are growing for harvesting, each row is planted 60cm apart and the cuttings 30cm to 60cm apart depending on the variety. This close planting ensures that the sticks grow straight and long and can be easily harvested the following year. We ordered 100 cuttings, 10 of each variety so the area taken up is relatively small. 100 plants won’t give us enough willow to go into production but supplemented with some bought sticks will give enough eventually to make some items for our own use. Once the leaves have dropped, we will cut this years growth back, some of which will become cuttings for new plants and over the years as the plants produce more sticks, we will have more to work with. 
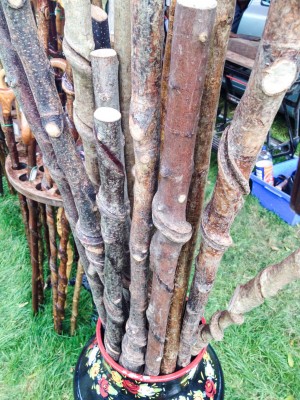
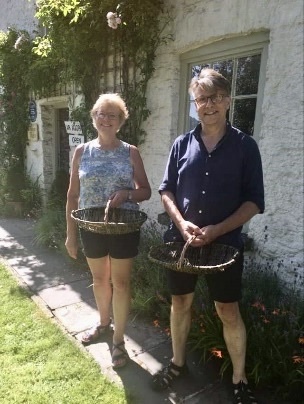
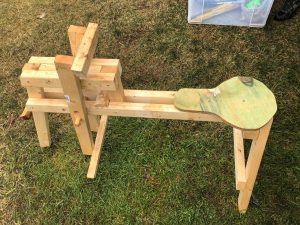
The above image shows the growth on a few of this year’s saplings. Not as vigorous as we had hoped but next year they may establish better.  With our willows in the ground, we booked a course at Hatton Willow and used some of the £300 funding provided by woodlands.co.uk as part of our purchase to fund the course.  The  session taught us how to make a trug, the courses just span a day, all materials and tools are supplied and at the end of the day you come away having learnt enough of a new skill to repeat the work,  an understanding of the material and  expanded your knowledge  and created your own hand-made basket. What Next for us?  The options are endless, willow hurdles for our allotment, Christmas wreaths, nesters for birds, green willow sculpture, who knows, we’ll keep you posted. Marie and Marcus Beard. * Sarah runs her courses at the Nantgarw China Works, a venue worth a visit in it’s own right. Osier : Willows, also called sallows and osiers, from the genus Salix,  found primarily on moist soils in cold and temperate regions of the Northern Hemisphere.

Next Page »