Woodland Bird Photography
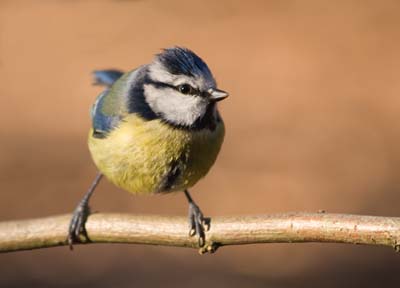
Probably one of the most evident wildlife groups you have in your woodland are the birds, but I can guarantee that if you set out into your wood with your camera over your shoulder and hope to sneak up to small birds in your wood you will be very, very lucky to get a good, relaxed, frame-filling shot of your quarry. The best thing to do is to start baiting the birds to concentrate them into a certain area. This area should be carefully chosen, probably facing north and in a clearing. This means that you make most of the light and that the background is not too close to your foreground subject so will be pleasantly blurred and not distracting to the overall image.
Once you start baiting, probably with seed and nut feeders, it is amazing to observe just how quickly birds like blue tits and great tits take advantage of the new food source and will normally be on to it within a day or so. If the food is constantly replenished you will get a high numbers of birds taking advantage of your generosity.
Now, a shot of birds on feeders is one thing but a shot of a small woodland bird on a natural perch is something entirely different and requires a little cunning. Once you have some good steady bird traffic coming in, move the feeder to a suitable spot and watch their approach routes. They will normally like to make a few approach perches instead of flying to the food source direct, so if you place a nice thin twig or a rotten, broken branch at a convenient distance from the food source with a little tweaking you should get the bird to repeatedly perch more or less in your chosen spot as if on cue.

Comments are closed for this post.
Discussion
I find it really hard to do this – thanks for the tips!
Thanks for this great advice David – and for the other camera advice you gave us. We are looking forward to coming on one of your courses soon!
Tracy

very nice photo here, I will add you to my RSS and look forward to more of your blogpost..
Las Vegas Photographer
12 January, 2010