Woodland Pedestrian Gates (Part 1)
Pedestrian gates look good, add focus and can provide ease of access into your wood or into a specific area – straddling barbed wire fences is not recommended.
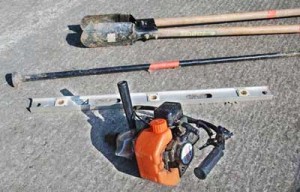
Equipment : –
- 1 x gate (3 or 4 feet);
- 1x gate hanging post (7 feet tall, 5-6 inches diameter);
- 1x latch post (7 feet tall, 4-5 inches diameter); 1x set of gate furniture (hangers and hooks – usually available as a set);
- 1x latch; 1x gate closer;
- 40mm staples
Tools: Metal spike (with flat top for tamping); small shovel; shove-holers (if available); Drill (cordless ok, petrol driven easier!); (Neville, the) level; hammer; adjustable spanner, fencing pliers (if you are installing the gate into an existing fence line).
How to:
First find a suitable site for your pedestrian entrance gate. This could be inserting in an existing fence line or at a low point in an old hedge bank for example. Make sure the site is as level as possible and clear it of vegetation. If you are putting the gate into an existing fence line you will need to hammer staples into the posts either side of the gate site, then carefully cut the wire at a point in the middle of two posts. You can then roll this out the way and re-tension it and attach it to the gate posts, once installed.
Choose which way you want your gate to swing. This will depend on your own preference and how the surrounding ground lies. If you are carrying goodies or tools into your wood it is easier to be able to swing the gate inwards. If the land slopes upwards from the gate site into your woodland you will need it to swing outwards so it doesn’t scrape on the ground.
When you have selected where your hanging post is going, mark a square area with the shovel that is slightly bigger than the post diameter. This is where the fun begins! If you install a lot of gates like my colleague Dick White and I, you end up naming your tools! So you can start your hole off with the shovel and then dig up the next chunk of soil to be removed with Spike (the metal bar). This is where you pray for lovely loose soil rather than stones. A good tip is to use a large builders tray or something similar here to put the soil onto, especially in wet conditions, to prevent losing soil, as you will need as much as possible to back fill the hole once the post is in.
Keep swapping the shovel for spike and keep digging. If you do have a set of Shove-holers these come in really handy when the hole becomes too deep to use the shovel. If you are not familiar with Shov-holers these are a bit like giant tweezers that enabled you to extract the soil in a deep hole. For a 7 foot post you will need a hole between 2-2.5 feet deep. If your struggling to get you hole that deep because of stones or tree roots go for as close to 2 feet as possible. If it is really necessary you can use ‘post-crete’ which is basically a specific concrete, but I like to use traditional methods of installing the post. This involves putting your post in the hole (this is where you may need some help!) and gradually back filling. Initially put a few stones or rocks around the base of the post – this helps to drain water away from the post. Then cover the rocks with some soil – not too much – and ‘tamp’ down with the flat top of your metal spike. This basically means gently tapping down on the soil to squash it altogether to hold the post firm in the ground. It is important to only put in 3 or 4 inches of soil at a time initially as this helps firm the post.
This is where you need your old mate Neville the level! (Don’t ask me why the tools are all masculine – we end up calling any powered machinery feminine names but that may be another blog article!). Once the post holds itself up, or you have some help, check the post is level, both along the fence line and from the front. Put another line of rocks in and then add some more soil on top and tamp down again. Continue this process, checking the post continues to be level. Once all the soil has been tamped in the post should be nice and firm.
Next - to hang the gate .........
Comments are closed for this post.