A Wooden Summerhouse – Part 2: The Reciprocal Roof

With the henge completed, the next stage of the summerhouse build was to construct the roof. The type of structure we have chosen is a ‘reciprocal roof’. This is a simple and elegant roof form which is entirely self-supporting. It is also very strong, making it an ideal base for carrying a green roof since these can be quite heavy.
To form a reciprocal roof, rafters are arranged in a spiral so that each rafter rests on the previous one. The last timber fits underneath the first so that the whole structure interlocks. This leaves a circular opening at the centre, which provides an opportunity for creating a skylight.
The first step of the construction was to prepare the rafters. We selected 8 sturdy timbers - one for each corner of the octagonal henge. These rafters were kept long enough to allow for plenty of overhang at the eaves. To achieve a nice even round opening at the top, we carefully marked up each rafter before assembly. A bit of mathematics was required to work out where the intersections of the rafters needed to be to give us a skylight diameter of 80cm. A shallow groove was cut into each rafter for the next one to sit in.
Next, we carried out a test run at ground level to check that the rafters all fitted together properly and also to ensure that everyone involved understood the process before we started trying to manouvre the heavy timbers up onto the henge (below is a sequence of photos of the construction process).
To assemble a reciprocal roof, the first rafter must be held in place by a temporary support known as a ‘Charlie’. This is a Y-shaped post placed roughly in the centre of the octagon and lashed securely to the columns to keep it upright.
Working with one person up a ladder in the centre of the octagon, and with others lifting the rafter up and over the corners of the henge, we placed the first rafter onto Charlie and tied it in place. The next rafter was then placed in the groove we had cut into the first, and temporarily fixed in place to prevent it from rolling. This process continued all the way round until we reached the last rafter, which slid underneath the first. This can be tricky if the gap is too small (it all depends on the height of Charlie). In this case, our Charlie turned out to be much taller than necessary so there was a large gap left.
With all the rafters now in place, it was time to remove Charlie. Because of the large gap between our first and last rafters, we lowered Charlie very slowly to allow the rafters to gradually move down and settle into place. Standing beneath the roof as it lowered was rather nerve-wracking! However, the structure held as it should and the rafters locked together very firmly.
Finally, the rafters were fixed into place with long screws at the intersections and at the perimeter of the henge. The roof feels very robust and from below, the spiral of rafters (which will be left exposed inside the summerhouse) looks great.
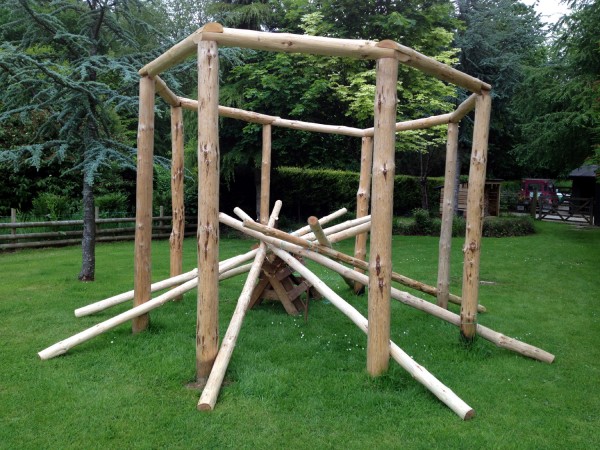
Trial run at ground level
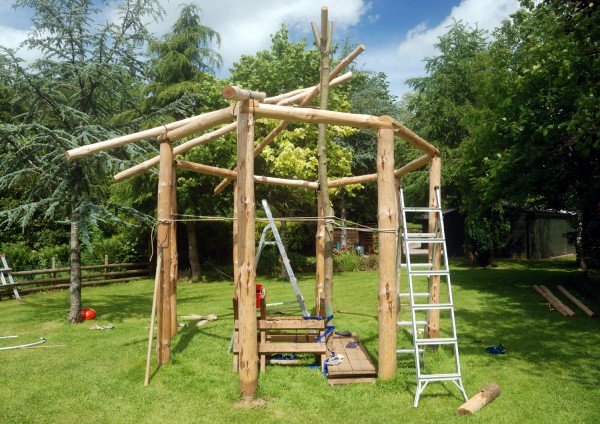
Charlie, supporting the first few rafters
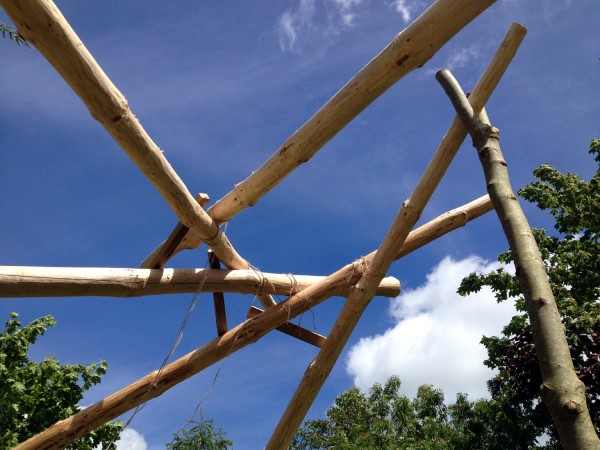
Temporary fixings keep rafters in place
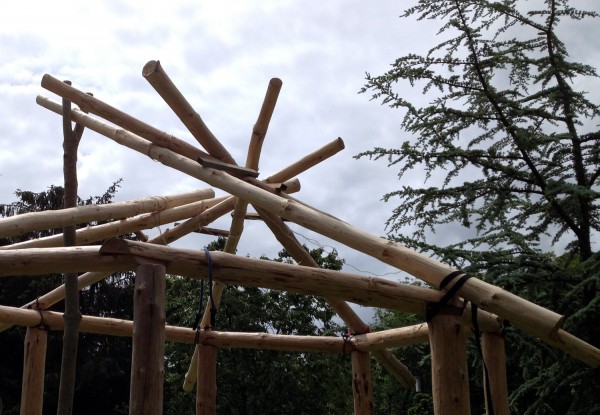
Gap left for the last rafter
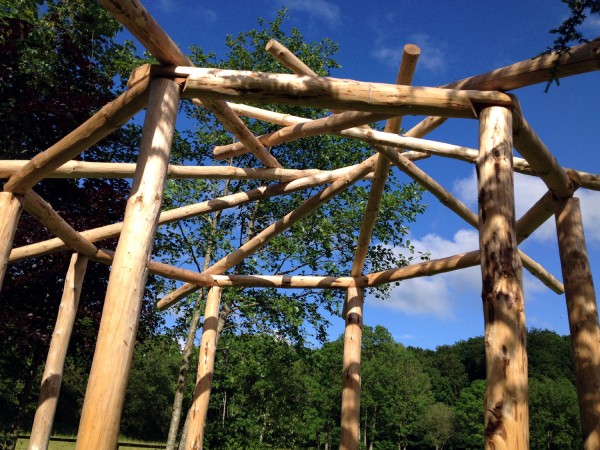
Completed reciprocal roof structure
Comments are closed for this post.
Discussion
That looks superb mind, very creative.
Nice one there. recycling, and self-sufficence at their very best.

Muy bien explicado, muchisimas gracias.
Graciela
23 April, 2021